Enabling Provisioning
This section explains how to enable account provisioning based on the identity and access management (IAM) platform used by your institution—either Microsoft Entra ID or ClassLink.
Provisioning With Microsoft Entra ID BETA Update 2026
Typing Pal provisioning with Microsoft Entra ID is currently available in beta. If your school uses this management platform and you would like to set up provisioning, please contact us. We will guide you through the configuration steps and collect your feedback to optimize the process.
Provisioning With ClassLink
1. Authorize data sharing
The person in charge of ClassLink must first authorize ClassLink data sharing with Typing Pal. See ClassLink’s documentation to learn more (login required).
Our team will then receive a message from ClassLink and will be able to set up provisioning for you. You will then be able to add Typing Pal to your LaunchPad.
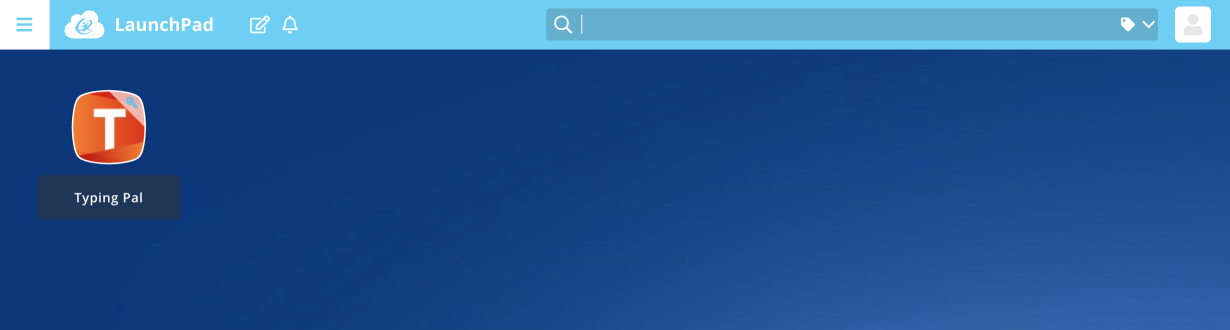
2. Add Typing Pal to your students’ LaunchPad
Once you have enabled provisioning, make sure to add Typing Pal to your students’ LaunchPad. See ClassLink’s instructions (login required):
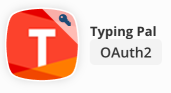
Important — Make sure you chose the correct app. Right-click the LaunchPad icon, then select More info. The window that appears should say “OAuth2” and “Typing Pal is a simple and effective web-based program for learners of all levels who want to touch type at full speed!”
3. Log in to Typing Pal from the LaunchPad
Once you have configured ClassLink so the app is displayed in the LaunchPad, Typing Pal’s icon will appear. To launch and log in to Typing Pal, double-click this icon. Typing Pal will open in a new window.